Showing posts with label composting toilet. Show all posts

Wednesday, October 3, 2012

Airhead Composting Toilet - Year 1 review

The boat is out of the water, we've started to do our winterizing and it's time to sit back and reflect on our new place for sitting back and reflecting. Our composting toilet. As you may recall from previous posts, I installed an Airhead composting toilet this spring.

Overall our experience with the Airhead has been very good. We used the boat 1-3 days per week throughout the summer, averaging four people onboard. We also had a full 6 day cruise with the family, in the middle of the summer, that was a true test of the system.
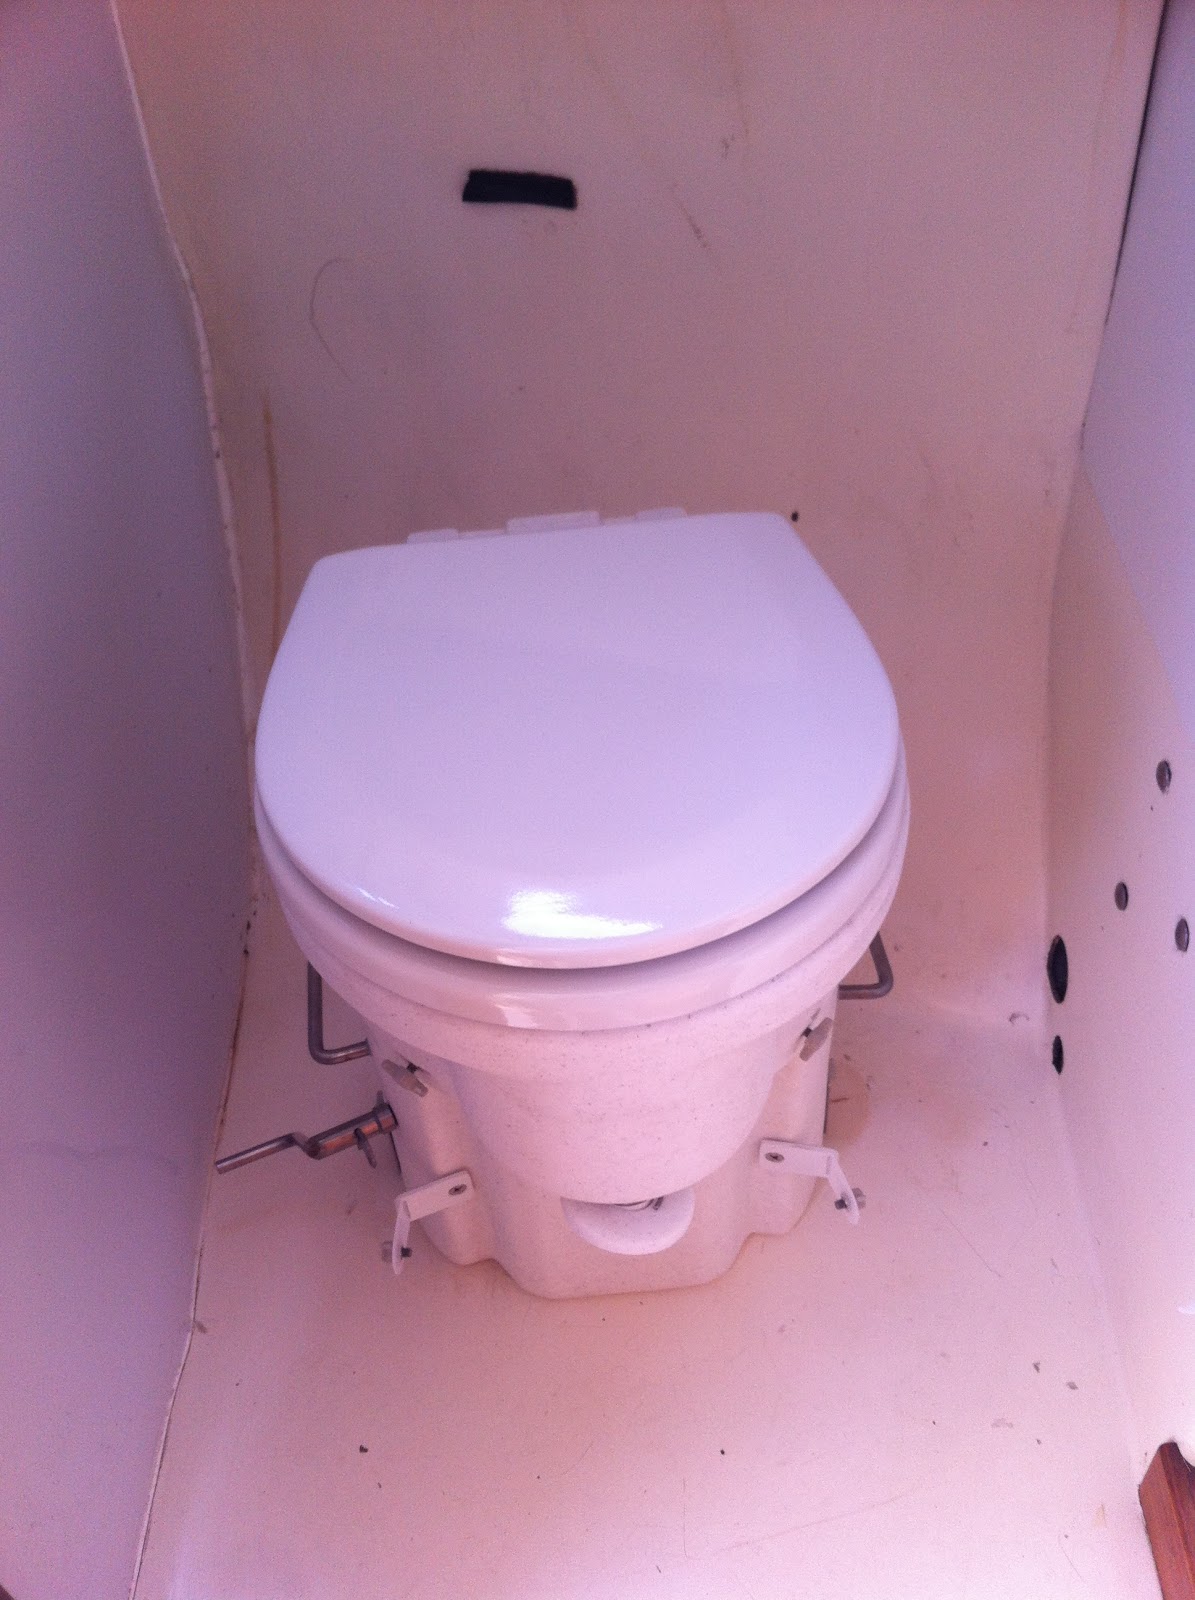
Using the Airhead

We have had almost no issues with using the Airhead. We do make sure to take a couple of minutes to orient guests on how to properly use the system but, really, it is dumb simple. 

The only use problem that we did have was with a younger child who insisted on opening the solid flap when it was a liquid job, if you know what I mean. That resulted in a smelly slurry being formed in the solid bin after a weekend of misuse. Adding extra peat moss solved the issue fairly quickly (a couple of days). 


Cleanliness 

We had no cleanliness issues. A quick wipe down on occasion and a spray bottle of water for occasional use kept the unit very clean. 


Emptying the unit

I found that we had to empty the liquid tank approximately every 1 1/2 days with 4 people on the boat. This varied a bit depending on the amount of beer being consumed! Emptying the liquid tank is quick and easy. Don't wait for it to get full in the middle of the night though! 

We did have to empty the unit near the end of August. I'm guessing that we could have gotten through the rest of the summer had we not had the above-mentioned 'slurry episode'. The extra peat moss added a lot of volume. Regardless, emptying the unit, was straight forward and no more difficult or unpleasant than a single pump-out would be in a standard holding tank setup. We emptied the contents into a doubled compostable garbage bag. We've set the bag behind our garden to give it some time over winter to fully compost.  


Issues

There weren't many issues but there were a few:

  1. Exhaust fan - The exhaust has stopped working 3 times throughout the summer. I simply had to take the vent housing apart and give the fan a little turn manually and it would start spinning again. I presume that there was little bits of dust that were clogging the fan. Perhaps a stronger fan motor would be in order. (Update [10/8/2012]: This part is under warranty and will be replaced by Airhead) 
  2.  Liquid level indicator - There is a little clear tube that shows the level of liquid in the tank. It regularly gets clogged by small bits of crud that end up in that tank through normal use. Don't rely on the little tube to tell you the bottle is full! 
  3. Agitator - The agitator inside the solid tank doesn't always stir the full contents of the unit. This only became apparent as I tried to add peat moss to fix my slurry issue. Not usually an issue.

Conclusion
I would recommend an Airhead to other boats (I regularly do!). It certainly beats our old holding tank system. It is easy to maintain and use. It is also a good conversation piece!

If you have any specific questions or comments about our experience with the unit (or anything else), please comment below. 

Friday, May 11, 2012

Composting Toilet Installation

Installation of the composting toilet itself is pretty straight forward. Much more effort was required removing the old toilet and adjusting the floor than was required for the actual installation of the toilet.

    Remove the existing toilet system parts, including:

    • Holding tank
    • Holding tank pump piping
    • Y-valve
    • Toilet and piping. Removing the toilet itself proved most difficult since the bolts holding it in place were stripped. A hacksaw was the final solution.

    Test fit
    Test fit the Airhead toilet. The back few inches of my head has a significant sloped area. This greatly reduces the working area of the toilet. After test fitting I decided to add a raised floor so that I could get the maximum front-to-back clearance.


     Make raised floor.
    I made the raised floor out of 1/2" plywood, cut to shape using a cardboard template and supported by 1x3 spruce boards. I stained and varnished the floor to match the rest of my bright-work. I used brass L-brackets to hold the raised floor in place. This will allow for easy removal if I need to get access below.

    Install Airhead unit. The toilet unit itself is literally as easy as screwing in 4 screws into the two brackets.
    Installed with raised floor

    Install air fan. I have an existing cowl vent into the bathroom. I simply screwed the fan assembly on top of the existing vent whole.
    Fan assembly attached to cowl vent

    Run vent hose. I used 6 feet of vent hose and simply attached it to the wall with 1 1/2" plastic pipe brackets. Once the pipe is tucked in properly it isn't as ugly as I expected.

    Run wiring.  I used standard 14 gauge wire (overkill I think) to wire directly from the fan to my auxiliary battery. I have two medium sized solar panels that keep up the charge on the battery. I don't even notice the load of the vent fan on my electrical. 

    Test run! I will update later with my production review of the toilet.

    Monday, March 5, 2012

    Why choose a composting toilet for your boat?

    The Preamble
    I've recently decided to replace the toilet and holding tank system in my Hughes 29.  This is the first of a series of posts that I am doing to outline my purchase decision, initial review (pre-installation), installation, short term review and finally a long term review. I will update this initial page with links to the other posts as I get to each step. I've also created an initial review of the [good] purchasing experience on my customer service blog here.

    Some background
    My Hughes 29 has a standard, manual pump, Jabsco marine head. This attaches to a Y-valve that has the option of either pumping directly overboard or pumping into a ~10 gallon soft holding tank (bag). I don't like the idea of pumping overboard and I try to avoid it as much as possible. So that leaves only the storage tank.

    I have had my sailboat for 3 years now. Since the first weekend on the boat I have had issues with the head smelling. I have tried tightening fittings, adding additives to the holding tank and frequent pump-outs but I still have a lingering smell problem. Sometimes it is tolerable, other times not.

    Last summer things came to a head (sorry!) because the only two pump-out stations nearby were both out of service for most of the summer. While I still had the option of dumping overboard, once the bag got full, that didn't alleviate my problem of having a large bag of sewage sitting under my bunk for most of the season. (I have no overboard pump connected to my tank.)

    A solution was needed. 

    My first reaction was to simply start from scratch and put in a new toilet and holding tank. I removed all of the pieces of the system last fall with that intention. I didn't want to start with any of the old components because I didn't want to risk a remaining piece being part of the problem. Then a few months ago I stumbled on the [seemingly] magic of the composting toilet.

    First things first, why a composting toilet? Here are the purported benefits (according to my research and vendor sites):

    • Odorless 
    According to all of the posts that I can find and the vendor documentation, these things are supposed to be odorless when they are installed and used properly. This was my #1 requirement. Apparently it is the separation of solids and liquids, along with the venting system that allow this.
    • Infrequent emptying of solids
    The leading vendors claim, and posts online seem to re-enforce the fact that you only need to empty the solids bin once or twice in a summer season (every 3 months for a live-aboard). Liquids are separated and need to be emptied every couple of days. I can live with carrying a bottle of pee onshore every couple of days. 
    • Space savings
    I really like the idea of reclaiming all of the space that my current holding tank takes under the front v-berth. The toilet itself is only 1 1/2" larger in each direction than my current Jabsco toilet. 
    • Easy installation
    Compared to changing out all of my current piping, installing a new tank, venting, and a manual overboard pump-out solution (a requirement in my view); installing the composting toilet will be a breeze! Simply bolt it down.
    • Environmentally friendly
    While I am very conscious of the environment, this isn't a huge factor in the decision for me. I don't believe that my boat (and small amount of discharge) is any more than a drop in the bucket compared to the local municipalities that dump [mostly untreated] waste into the same river system and harbour. But, it is a nice-to-have. 
    • Cost
    The vendors claim that their composting toilets are cheaper to install than a traditional system. I don't really believe that. The full cost of the composting toilet is around $1000-$1200 (after taxes and shipping). I can install a new version of what I have for around half that cost. 
    • Less maintenance
    Anything that can save maintenance time on the boat is worth its weight in gold. I don't mind doing maintenance but that isn't why I have the thing. Less is better.

    The two main vendors that I examined (that were in my price range) were:

    These vendors appear to have similar products and each has good reviews in the Internet forums. I chose Airhead because of the resoundingly good customer service stories that I heard. That is important to me

    Stay tuned for my future posts about my Airhead. Time will tell whether this decision was as good as it seems.