Showing posts with label sailing. Show all posts

Monday, August 31, 2015

NauticEd - First impressions

I'm always looking for ways to increase my boating/sailing knowledge. I've enjoyed doing instructor led courses through the Canadian Power and Sail Squadron but they don't always have the course selection that I want and the timing isn't always convenient.

I happily stumbled upon NauticEd the other day. They have a variety of interesting looking courses available online. Some of the interesting looking modules include: Storm Tactics, Coastal Navigation and Weather.

They also have a certification program that will get you on your way to an RYA certification or a qualification cert for bareboat chartering. I'm not sold on the certification usefulness at this point but regardless I think there are some useful looking courses.

To try it out I did the free Navigation Rules Clinic. I was pleased with the course layout. It was easy to follow, the content was quality and it made a dry topic more palatable. They promised that everyone would take away something new from the course, even if you are experienced. I did!

The test at the end of the course was 30 questions of multiple choice. My only critique is that some of the questions are set up so that a couple of the possible answers are jokes so you only really have to consider 2 possible answers. This make the test a bit more fun to read but doesn't really challenge you to consider the possibilities.

I really like the graphics that they use on their course and test. They are clear and easy to interpret the situation. They have some video content but I wasn't as impressed by that. They preface each of their videos with canned marketing material that takes time and doesn't add value. The videos are also animated a little to fast so it isn't easy to follow what is happening without replaying them several times.

The cost for the payed courses is in line with an instructor led course and I think if they are the same quality then they are worth while.

I'm considering doing the Captains Rank course that provides most of the content for under $400. Not a bad price for a winter's worth of content. I'll post on my decision and results.

If you are looking at doing one of their courses, below is a promo code that gives $15 off. (FYI. They offer the promo code referral feature to anyone!)


Friday, August 28, 2015

Maritime VHF radio licensing in Canada

I recently went through the process of getting a new radio license and MMSI number for the new handheld radio I got for my boat. The process isn't really straight forward. So, for reference, here is the basic process.


Everyone needs a VHF license - Get your Maritime Radio license

It is law that everyone operating a VHF must have a Maritime Radio license. I've never been asked for my card but I truly think that it's a good idea anyways. How many times have we heard idiots on the VHF that don't know the protocol (or don't care?). Since VHF is an open/public medium, maintaining proper protocol is important.

Power and Sail Squadron - Maritime Radio Course

http://www.boatingcourses.ca/course-descriptions/maritime-radio


If you want to use DSC - Apply for an MMSI ID

Digital Selective Calling (DSC) is a mechanism for calling specific boats or groups of boats instead of using the standard Channel 16 calling. It also allows for nice features like automated distress signals. While it doesn't seem to be widely used yet, I imagine it will be once more people upgrade their radios and get used to using the system.

In order to use DSC your radio needs an MI or MMSI number (MI is for mobile VHF handsets).


The applications for a number are available here:
http://www.ic.gc.ca/eic/site/sd-sd.nsf/eng/00009.html


Be aware that once you program an MMSI number into a device it CANNOT be easily changed. It usually involves sending the radio back to the manufacturer. For this reason, make sure that you are assigning the ID to the right radio. You only have one shot at this or you will be applying for another ID.


If you are traveling to the US - Apply for a Maritime Mobile Radio Station Licence (ship license)


Here is my understanding from the nice people at Industry Canada...

You do not need a Ship license if you are from Canada and staying in Canada.

You do not need a Ship License if you are from the US and staying in the US.

However, you DO need a Ship License if you are going between the Canada and the US. Dumb...yes.

"Basic" over view of the application process:

http://www.ic.gc.ca/eic/site/smt-gst.nsf/eng/sf00023.html


Other info


If any of this is confusing or if you have any questions, the people at the Industry Canada regional offices are very friendly and helpful. This is also where you can find the email address to submit your forms

http://www.ic.gc.ca/eic/site/smt-gst.nsf/eng/sf01742.html

If you want to search for an existing MMSI number you can here:

https://sd.ic.gc.ca/pls/engdoc_anon/MI_PUBLIC$search.formquery?Z_CHK=0

Tuesday, June 9, 2015

BoatLogger - Android log app woes

Magical flying boat track

There's not too much positive to say about my experience so far with the BoatLogger app on Android. Buggy is an understatement. I'm not giving up hope yet but I sure hope they fix some of the persistent issues before my renewal time comes up.

On a positive note, as demonstrated in the picture above, BoatLogger has empowered my boat to fly. Awesome.

Monday, May 4, 2015

Pram overhaul - Part 1

After 4 years of abuse my pram has begun to show some wear. The primary problem, and the one that has forced this overhaul, is that the bow has begun to pull apart. This is mostly due to me towing her, in rather rough seas, to Digby last year. Basically, the smashing on the waves began to pull the bow right off! Although, my new boat has davits, I expect I will still tow her a fair amount, so I wanted to reinforce the bow so that it would survive another few years of beatings.

Note: The pics below are all taken after demolition, an initial overall sanding and some general filling repair. It isn't actually as f-ugly as it looks.

I decided, that rather than putting the bow back together with the existing stringers, I would rather replace them with a stitch-and-glue style corner joint. I have successfully used this style of building previously and I know that it will be way stronger once I have a bunch of epoxy and fibreglass tape jammed into that seam.

I also decided that I would reinforce the sheer of the bow, and reinforce the seat to bow joint to give it more strength.

The overall goal here is to make the bow as bulletproof as possible.


Bow stringer removed and sanded
I removed the sheer, the front ribs and the top of the seat. Since the seat had been cut around the rib, I used the existing seat top as a template to make a new one without the holes left by the ribs.

To hold the bow and side panels in place, and keep the epoxy from dripping through, I used duct tape.

The wonders of duct tape
  Since I was doing the job, I figured I should also deal with a bit of rot that I had in the aft of the boat. The back starboard stringer had a middle section showing some rot. Rather than scarfing in a repair piece, I decided to stick with the stitch-and-glue idea and replace that whole length with epoxy and tape as well. I did both sides for symmetry.    

Rear stringers removed and sanded


I removed the two bow stringers from behind the rowing seat, to the back seat.  A chisel made quick work of it.

Filleted and taped

I sanded the areas to be epoxied, down to wood.

I used West System epoxy and silica filler to create the fillets. A bunch of plastic disposable spoons made the filleting easy. Once the fillet epoxy had kicked off I added 4" bi-axial tape and whetted it out thoroughly.

To be continued....

Friday, March 6, 2015

Boatlogger.com - First Impressions

The simplest way to keep track of your boat activities is using a traditional paper log book. But, I'm a geek and using paper to track anything isn't appealing. Whether or not I actually look at it again, I like to have the ability to track, calculate, re-post or reference my data without flipping through a paper log.

So, I have been looking for a good electronic replacement for tracking boat information for a while. There are several phone apps, websites and thick client applications that have this goal but none have struck my fancy until BoatLogger.

Now, BoatLogger is definitely a beta product at this point. There is still a lot of glitchiness in the site but I see promise in the service and I'm betting that, if they can survive long enough and get enough users early on, this site is going to become the default platform for this type of tracking.

What are the killer features of BoatLogger?

  1. Easy of customization - Every aspect of a yacht site can be customized. For those who will be using the service as a primary boat site this is a great feature. For those of us (me included) that will be using it more as a utility service to back my own site, the customized look doesn't get in the way.  Adding data fields is easy and most data panes are customizable.
  2. Reasonable default functionality and look - Out of the box the system is fairly nice looking and functional. This will be important to the non-geek users that aren't interested in a customized experience. 
  3. Good map-enabled log book - I haven't spent much time yet with the logging feature (ice doesn't make for good sailing!) but I look forward to trying this extensively this summer and reporting back. The logging functionality appears to be flexible and functional. Time will tell. It does also give the ability to import GPS data from other sources. Nice feature.
  4. Mobile app (Android) - While I haven't spent a lot of time with it yet, it does seem to have all of the basic features needed for a log. More on this in a future post. 
  5. Support for GPS tracking devices - The ability to tie into a SPOT or inReach tracker is a great feature. These devices tend to be more reliable than a phone. 
  6. Ability to embed data in external sites - For me this feature is important. Since www.afloat.ca is my primary online location, it is important that any service I use integrates into the site. I like the idea that I can use BoatLogger as the data repository for my data and then integrate it directly into my Blogger site. There seem to be a few integration issues but I am confident that this will be a great feature once the bugs are ironed out. 
  7. A strong roadmap - If the developers at BoatLogger deliver on half of the features that they have planned it is going to be a killer site. Things like instrument integration really are the holy grail of boat management. 
The BoatLogger site also has features for race and flotilla tracking. I haven't explored those yet but they seem like interesting concepts. 

I look forward to seeing where BoatLogger goes. I'm sold on the concept and I'm willing to put my money where my mouth is. The more people start using the service the more likely it is that it will succeed. Give it a try, you might be pleasantly surprised at what they have going on. 


Wednesday, December 24, 2014

Shackleton II - Best Christmas gift ever


After searching for 6 months we have decided and are in the final stages of completing the purchase of a new boat.

Shackleton II is a C&C Landfall 38. She is a beauty!

I look forward to many new adventures with this boat. I believe that she has the capability to take me anywhere. Now I just need to figure out where that is and get to it!

Of course, being the geek that I am, I have created a new site to track specific Landfall 38 resources. My hope for the site is that it can be a resource for others who own or who are buying Landfall 38s. I haven't found another user group site for this boat so I hope that others find it to be a useful resource.

Check it out at http://landfall38.com


Sunday, November 2, 2014

The perfect cruising boat - My shortlist

The solution to two-foot-itis?
I have recently come down with a severe case of two-foot-itis. Salammbo, our Hughes 29, has been a wonderful boat for our family and has whet our appetite enough that we are now looking for something bigger.

When I broached the subject with my wife, her reaction was "I don't want to do this for a couple of feet, if we're going to do it, let's do it." Yes, she is awesome. With that in mind, we have refined our search to include only boats that will keep us comfortable for many years of cruising.

I have set out these criteria for our new boat:

  1. Price - Always a factor... we'll be looking at older, used, boats to fit this criteria. My preference is a boat that is good value for the money. I don't mind putting sweat equity into a boat to clean it up and improve it's capability. 
  2. Pretty -  Yes this is subjective, but I don't want an ugly boat! I prefer classic lines on a boat.
  3. In the 35' to 40' range (15,000lbs - 25,000lbs displacement) - This is the general range that fits our budget and space needs. Larger boats would be more expensive for ongoing maintenance and harder to short hand. Smaller boats are too cramped for us.
  4. Solidly built - offshore capable - We don't plan to spend a lot of time offshore but we will want to do limited offshore passages. 
  5. Suitable accommodations for 4 adults for limited duration- Us and our two, quickly growing, kids
  6. Suitable accommodations for a couple to cruise indefinitely - Empty nest planning
  7. Good short handed capability - My wife likes to take a less active role in handling the boat. My ability to short hand is important. 
  8. Fuel capacity (>40 gallons) - Enough fuel for several days of motoring if the wind doesn't cooperate. Our local cruising grounds tend to be less favorable to sailing. 
  9. Water capacity (>80 gallons) - Should keep us going for a week or two at a time without having to worry about consumption too much. We currently do well with 15 gallons for a week of cruising. 
  10. Hot/Cold water and shower - Cleanliness is next to godliness, right? Crew happiness is important!
  11. Sail-away condition suitable for short duration coastal or river cruising - I don't mind a boat that needs work (they all do!) but, given the short duration of a New Brunswick summer, the boat needs to be usable right away. I'll get to the projects the first winter.
  12. Shallow draft - Less than 5' 
  13. Good anchoring setup - We prefer anchoring over mooring since it is more suitable to our anti-social cruising habits. A good anchoring setup makes life easier.
  14. Reasonable performance under sail and power - I don't need a racer but would like something with reasonable performance.
With this in mind, I have come up with the following shortlist of boats that might meet our requirements, depending on how they are equipped. This list will undoubtedly grow as I find more that I like. Links are to posts about my impressions of the boats before and after viewing:

  • Allied Mistress 39

  • Allied Princess 36

  • C&C Landfall 38


  • Hughes 38

  • Pearson 365

  • Pearson 36

  • Niagara 35

  • Endeavor 37

  • Seafarer 38


Do you have a boat in mind that meets these criteria that should be added to the list? Comment below, I'd love to hear about it.

Wednesday, September 10, 2014

A wet evening racing

One of the best Wednesday night races I can remember. Warm, heavy rain and great wind.
Wednesday night race - Grand Lake, NB

Tuesday, August 5, 2014

Cruising Saint John to Digby

Saint John Reversing Falls
While I have done some cruising in the Bay of Fundy previously, I had never crossed the Bay. There isn't any good reason to be apprehensive about this type of trip, since it isn't any more complicated than going up the coast, but the sheer distance offshore was a daunting thought for me and I was nervous.

We planned to do the crossing on Saturday, July 26th and come back on  July 29th.


Market Slip
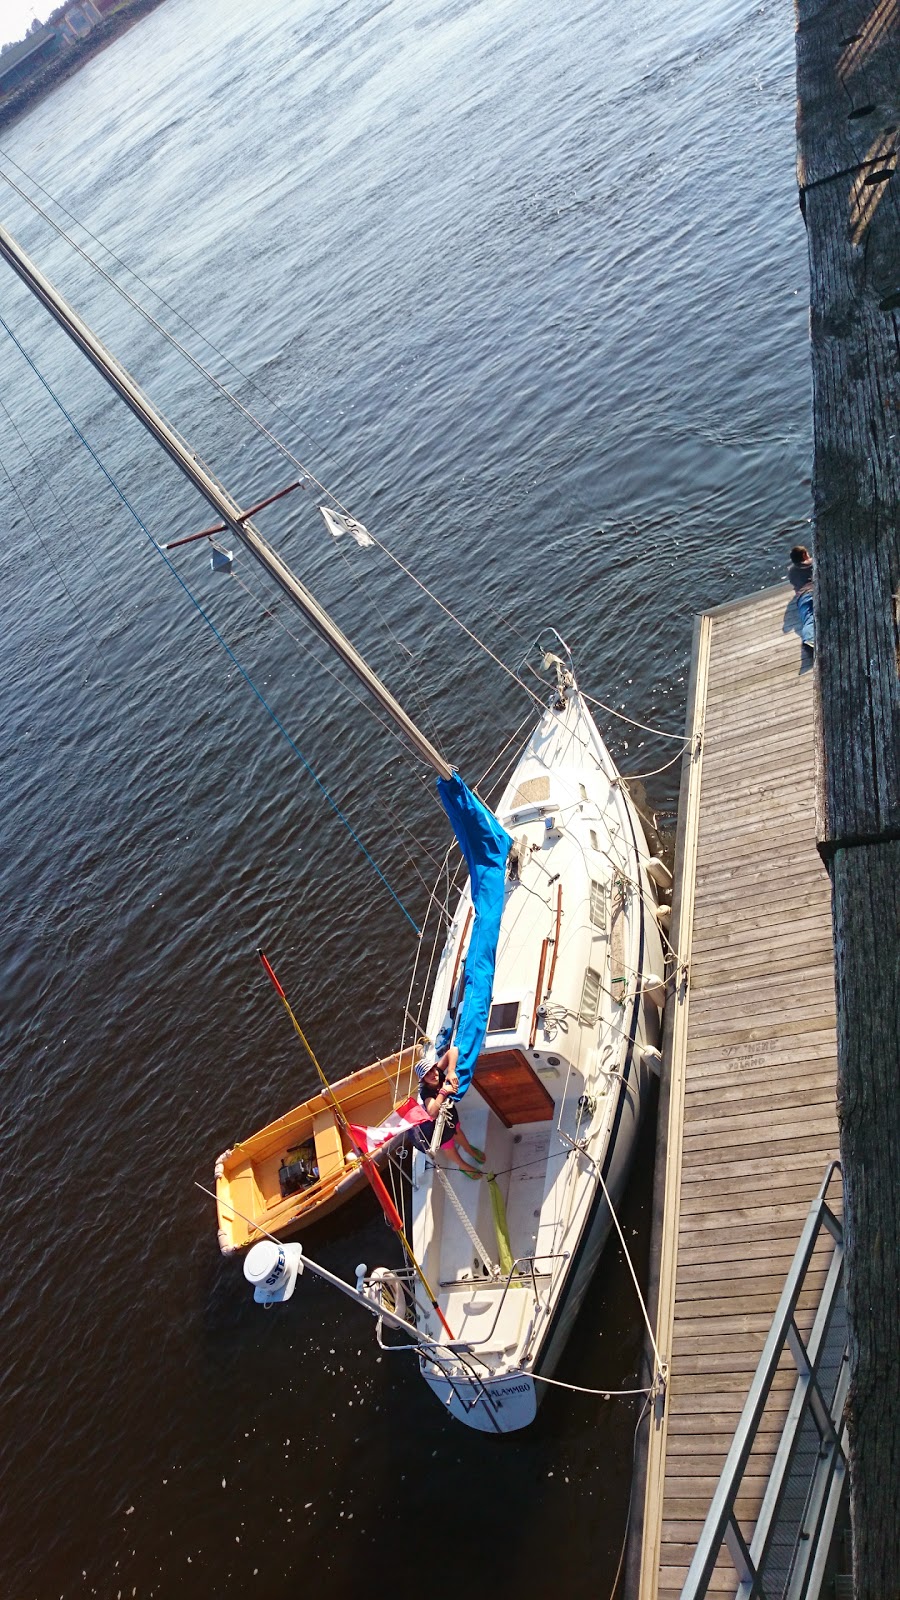
Market Slip
Market Slip
Since we had some schedule restrictions, and because of the tide times, we had to traverse the Falls on Friday and stay at Market Slip until Saturday morning. We traversed the Reversing Falls on Friday afternoon at 2:15pm. 

Initially our stay at Market Slip was reasonable. It is a convenient location and the docks are beautiful. As anybody who has stayed at the Slip for any amount of time will know, it did not stay that way. Since Market Slip has zero protection from inbound waves, it is a VERY uncomfortable resting spot. In fact, resting isn't at all what we did...

Side note, I have since written a letter to the mayor of Saint John to plead for improvements to this slip. It could be such a great feature!


The Crossing to Digby
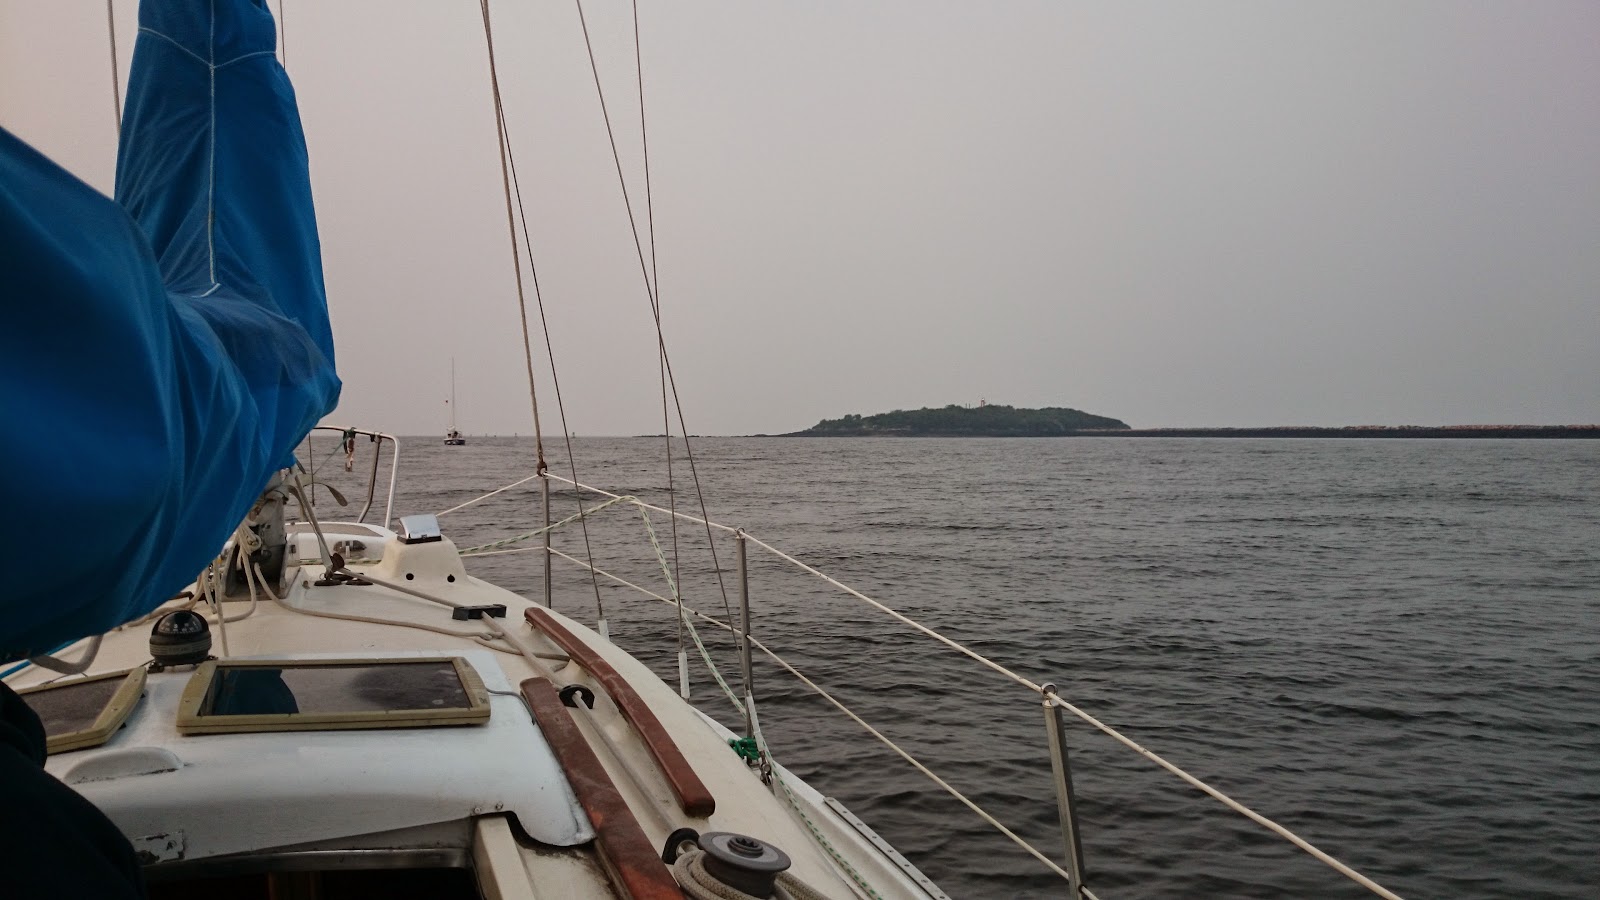
Partridge Island
Partridge Island
We left Saint John at 6am on Saturday with an estimated travel time of 10 hours. The wind was southerly at 15km/hr and gusting to 25 km/hr.

There were a few hours, as we approached Nova Scotia, where the winds came up and gusted to 38km/hr and the seas were higher (maybe 2m). This was a little less comfortable, but still reasonable, and I was able to maintain good boat speed motor/sailing with my #2 genoa and main sails up. As we approached Digby Gut the wind came up more (gusts to 42 km/hr) and I lowered the main entirely. I would have reefed had I had more time before the Gut but it didn't seem worth the effort.

My track across the Bay followed a near perfect sign-wave with the tides. We ended up approaching Digby 6Nm NE of Digby Gut.

I had originally planned to wait outside of Digby and sail around until the tides were favorable for the Gut, however, since the Bay was getting rough and windy I decided to try making it through the Gut against the tide.

Digby Gut has currents of up to 5 knots. We experienced those. We were motor sailing at 6 1/2 knots and it took us almost 1 1/2 hours to get 3.5km through the Gut. The western side of the Gut was wild looking with rollers from the Bay standing up on the outgoing tide flow. I'm glad we were able to stay to the other side!

The approach to Digby was easy and uneventful. The Annapolis Basin is beautiful and was a well protected treat after being on the Bay.

Digby

Digby is a wonderful little town with great facilities. 

RWNYC Marina
RWNYC Marina
The Royal Western Nova Scotia Yacht Club has a great dock system with full power and water hook-up. Gas is available on the docks as well. A quick call to the dock master got us set up for a stop-in and they were great hosts during our stay. 

Protection at the club docks is great. There is some noise from the commercial boats but nothing unreasonable.

The marina is located right downtown in Digby and allows for easy access to restaurants, treats and supplies. Several marine supply stores are close to the marina.

Showers are available a short walk up the road in a municipal building. They are coin operated, clean and well serviced. 

If you need more supplies there are grocery stores and a hardware store within a 20 minute walk. Taxis are also available in Digby and surrounding area.

 
Annapolis Royal
Annapolis Royal
 Annapolis Royal is a wonderful community that can be reached by sail (2 hours up river) or by transit. Since we had a storm the day of our trip to Annapolis Royal we chose the bus route instead of sailing. the transit system is easy and cheap.


Upper Clements Park is a nice place to visit if you have children (or if you like rides yourself). This amusement park is really well layed out, has some fun rides and is reasonably priced. The rollercoaster is a bit of a neck breaker, you've been warned. The flume is great fun!

We took a taxi to the park since the transit doesn't run on the weekends.


Upper Clements Park
Upper Clements Park

Digby to Saint John

We planned our trip back to Saint John for Wednesday morning. An early 6am departure was planned in order to make use of the outgoing tide and so that we could catch the Reversing Falls in Saint John 

The sail back across was beautiful until approximately 15 Nm offshore when we hit a wall of fog. The rest of the trip was by radar since we had zero visibility. 

Beautiful day on the Bay of Fundy

We arrived in Saint John at around 1530 and were well positioned for a 1719 traversal of the Falls after another quick stop at Market Slip.

Overall this trip was very enjoyable and I would certainly recommend it to someone who wants to try venturing a little further out into the Bay.

Have you done this trip? How was your experience? Comment below!

Friday, June 27, 2014

Friday, June 20, 2014

Reversing Falls Slack Tide Traversal Times

Here is an easy reference for determining when the approximate time is for slack tide at Reversing Falls on the Saint John River. Slack time provides an approximately 20 minute window for traversing the passage.

These times are based on:
  • Low slack, add 3 hours and 50 minutes to low tide
  • High slack, add 2 hours and 25 minutes to high tide
The source tide data is from: http://www.waterlevels.gc.ca/eng/data/table/2015/wlev_ref/65

Transit times are current local time with DST applied.

You can download an offline copy of this spreadsheet here.


Actual times will depend on the current river water levels but this will give you a close guide. You should review the cruising guides for more information on traversing the falls safely and to confirm calculations.


Saturday, November 2, 2013

Atomic 4 Thermostat cleaning

While investigating cooling issues in my Atomic 4 I came across an FAQ at the Moyer Marine site that described cleaning the thermostat every season. "It really is better to use a thermostat in the Atomic 4, and to keep it clean by soaking it in vinegar every season." 

While I have had my thermostat out annually for winterizing, I have never cleaned it. So I decided to give it a try.
Atomic 4 Thermostat
Half way clean, after 2 days soaking in vinegar
I had no idea how dirty the thermostat was! In fact, I though that the thermostat had been rusty but, now that it is clean, I realize that the rust was just gunk. 40 years of gunk took 3 days of soaking to clean (and 3 changes of vinegar).

I also wasn't sure what temperature rating my thermostat was rated for so I tested it by boiling it.

Boil testing Atomic 4 thermostatBoil testing Atomic 4 thermostat

The thermostat started opening around 125 degrees Fahrenheit and was fully open around 160 degrees.It was approximately 1/4" open at it's fullest. I'm not sure if either of these are measurements are within spec because I can't find a good reference online. If anyone knows, please comment below.

I'm not sure if my dirty thermostat was the cause of my cooling issues but it couldn't be helping.

Friday, June 7, 2013

Electronics makeover - Part 1 - Radar mast

My radar mast was purchased second hand (Kijiji is my heroine). While it was a great deal ($50) it didn't quite fit my boat. The first step in my radar installation process was to adapt this radar mast for my use.
Radar mast

Cut off existing mounting points and brackets
The mast had existing mounting brackets welded in places that aren't suitable for my boat. I cut these off using an angle grinder with a metal cutoff disk. It was very quick cutting through the aluminum...Careful not to take off too much! I also took this opportunity to sand off the existing paint and smooth out the overall surface of the mast.

Create and install mounting bracket for GPS receiver
Using a combination of a bracket that was on the original radar mast and some aluminum plating that I had laying around, I created a nice little mounting bracket for the GPS receiver. Basically I just formed the plating into a two piece circular mounting bracket using a piece of 2" pipe as a form.

Prime and paint
I used automotive aluminum spray cans to prime and paint the while unit. The paint seems very durable. We'll see if it holds up.

Deck Installation
To install the mast I used a 3x6 (1/4" thick) piece of aluminum as a backing plate and a pivoting bracket at the base. I drilled holes to accommodate the 1/2" stainless bolts that would secure the mast to the backing plate. I applied silicone sealant to the bottom of the mast and around the screw holes to prevent water leakage.

Rail bracing
Using more spare pieces of aluminum, some bits and pieces from other clamps, and a hose clamp, I attached the mast to my aft safety rail. This is still pretty ugly and I need to come up with a better clamp here.

Extra bracing
I quickly realized that the mast still did not have enough stability. I created an additional diaganol brace from my GPS mounting bracket to the cabin deck on. I used a piece of 1" aluminum tubing for the brace. I think it could still use one more brace on the other side but I'm going to wait and see how it performs first.
Installation of gear
I installed the radar and GPS receiver using the provider hardware. I did realize, after the fact, that the hole that I had drilled for the cabling wouldn't accommodate the GPS connector. I had to make some last minute modifications to get it to fit.


If more detail on any of these steps would be useful to you, ask for clarification in a comment below and I'll update with the further detail.

Wednesday, January 23, 2013

Choosing a new radar system

Radar and Chartplotter
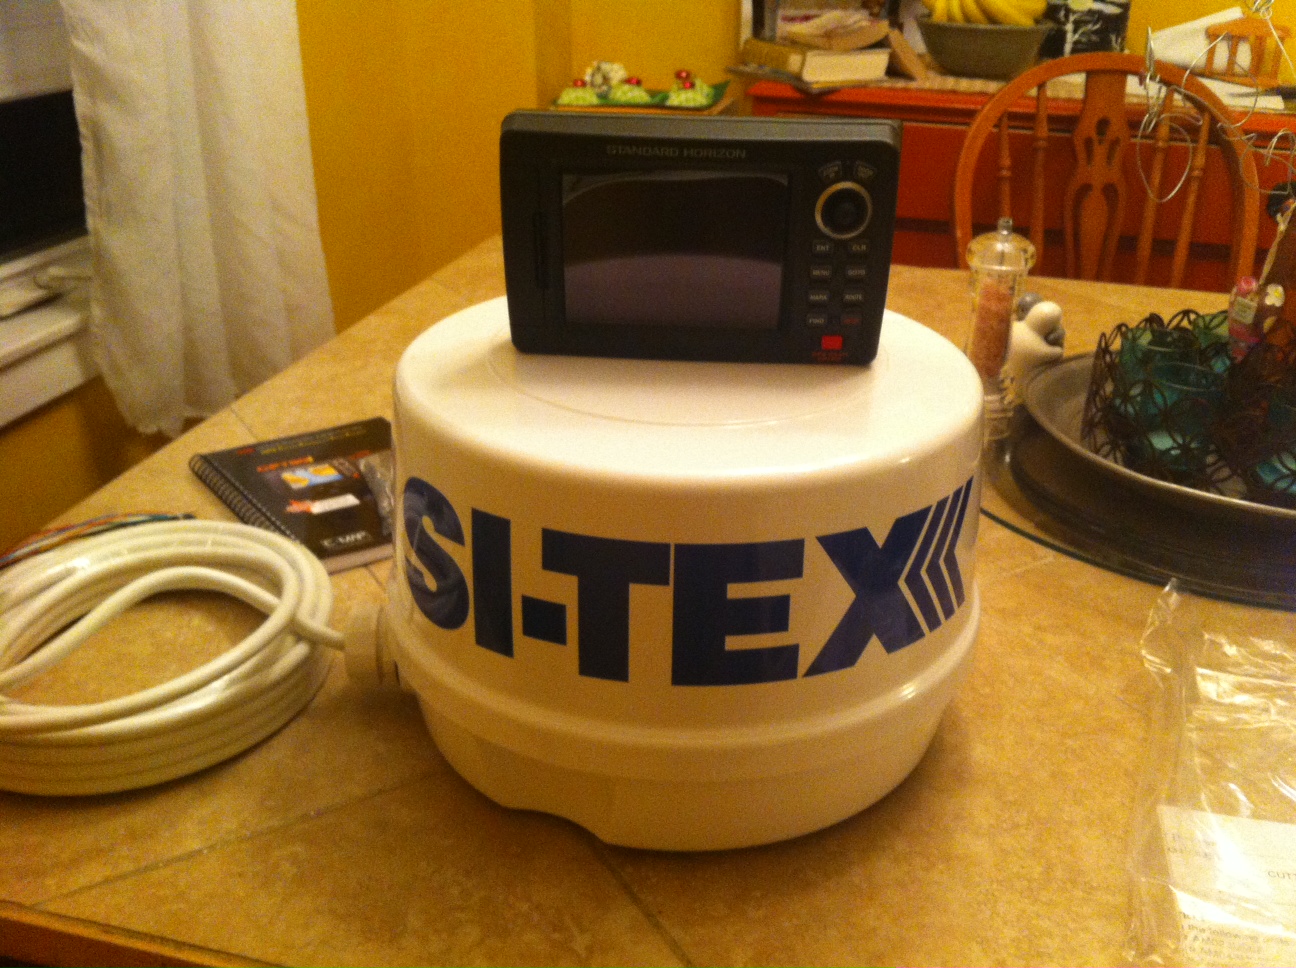
SI-TEX Radar with Standard Horizon CP190i Chartplotter
Living and boating on/near the Bay of Fundy means that fog is a regular problem. With this in mind, I have been looking to purchase a radar system for the last couple of years.

Neither Kijiji nor eBay offered me any real bargains in my hunt so this winter I got serious about the search and looking for new units.

Current Setup
My current electronics are very simple, yet effective. I have an old Magellan 315 handheld GPS, supplemented by an iPhone 4 with charting apps (Navionics). My depth finder is a vintage SeaFarer 3 that looks like something from an old James Bond movie.

This setup isn't fancy but has proven very effective.

Criteria for Radar 
Given the success of my current setup my only real criteria for a new radar system was...well...that it does radar! A few other criteria that factored in:

  • Inexpensive - The new system should be worth less than the boat floating it
  • Relatively small dome
  • Relatively small display that will fit in my available bulkhead space
  • Options for charting  (Not mandatory)
  • Options for adding depth sounder (Not mandatory)
The options
I soon realized that a single purpose radar screen, while available, isn't very cost effective. For a small amount more a chartplotter can be included and offers many more features. I quickly changed tack to focus on chartplotter integrated options only. 


Each of the main manufacturers have similar offerings for chartplotters. They range from simple units to high-end large display units with tight integration with...everything. Of course each does there thing in their own proprietary method (I'll save that rant for another day).

For radar domes there are a few options but basically it comes down to the High Definition/Broadband options or standard models. Within each category you can choose between low-end systems with limited range or higher-end devices with longer range and better overall performance.

The Decision
I was VERY tempted to buy some of the higher end units. There are all kinds of features that are available for "just a couple hundred more". Looking at each unit and the next one up ...and the next one up, it is easy to get pulled into the cool features of the more expensive units.

In the end I dug deep and really analyzed my requirements. When it comes down to it, I expect to be out on the Bay [perhaps] 2 weeks a year. The rest is on the protected Saint John River system. Of those days on the Bay, only a few will be foggy and usually I would just wait out the fog at anchor.

Do I really need all of the extra features for that minimal amount of usage?

Also, I really don't have a great desire to install windmeters, fuel indicators, water level gauges or other electronics that would tie into a chartplotter. So the integration piece isn't important to me.

My final choice was to keep it simple, keep it cheap and go with a SI-TEX MDS-1 dome with a Standard Horizon CP190i chartplotter. This is about as basic as it gets for a chartplotter/radar combo.

I did a LOT of price comparison. I shopped around and compared prices at practically every online vendor in North America. I really expected that Amazon, Overtons or another large US retailer would be cheapest.  In the end I purchased the unit from the local Halifax merchant The Binnacle. Their prices were second to none since the unit was on sale and since they offer free shipping. They have also consistently given me stellar service. In the end $1807 (including tax) got me my new toy.

The success of my plotter choice should clarify over the coming year. I will include details of my installation as well as my review of the product choices as I use them.

If you have opinions about these units, boat electronics...or anything else, please leave a comment.

Wednesday, October 3, 2012

Airhead Composting Toilet - Year 1 review

The boat is out of the water, we've started to do our winterizing and it's time to sit back and reflect on our new place for sitting back and reflecting. Our composting toilet. As you may recall from previous posts, I installed an Airhead composting toilet this spring.

Overall our experience with the Airhead has been very good. We used the boat 1-3 days per week throughout the summer, averaging four people onboard. We also had a full 6 day cruise with the family, in the middle of the summer, that was a true test of the system.

Using the Airhead

We have had almost no issues with using the Airhead. We do make sure to take a couple of minutes to orient guests on how to properly use the system but, really, it is dumb simple. 

The only use problem that we did have was with a younger child who insisted on opening the solid flap when it was a liquid job, if you know what I mean. That resulted in a smelly slurry being formed in the solid bin after a weekend of misuse. Adding extra peat moss solved the issue fairly quickly (a couple of days). 


Cleanliness 

We had no cleanliness issues. A quick wipe down on occasion and a spray bottle of water for occasional use kept the unit very clean. 


Emptying the unit

I found that we had to empty the liquid tank approximately every 1 1/2 days with 4 people on the boat. This varied a bit depending on the amount of beer being consumed! Emptying the liquid tank is quick and easy. Don't wait for it to get full in the middle of the night though! 

We did have to empty the unit near the end of August. I'm guessing that we could have gotten through the rest of the summer had we not had the above-mentioned 'slurry episode'. The extra peat moss added a lot of volume. Regardless, emptying the unit, was straight forward and no more difficult or unpleasant than a single pump-out would be in a standard holding tank setup. We emptied the contents into a doubled compostable garbage bag. We've set the bag behind our garden to give it some time over winter to fully compost.  


Issues

There weren't many issues but there were a few:

  1. Exhaust fan - The exhaust has stopped working 3 times throughout the summer. I simply had to take the vent housing apart and give the fan a little turn manually and it would start spinning again. I presume that there was little bits of dust that were clogging the fan. Perhaps a stronger fan motor would be in order. (Update [10/8/2012]: This part is under warranty and will be replaced by Airhead) 
  2.  Liquid level indicator - There is a little clear tube that shows the level of liquid in the tank. It regularly gets clogged by small bits of crud that end up in that tank through normal use. Don't rely on the little tube to tell you the bottle is full! 
  3. Agitator - The agitator inside the solid tank doesn't always stir the full contents of the unit. This only became apparent as I tried to add peat moss to fix my slurry issue. Not usually an issue.

Conclusion
I would recommend an Airhead to other boats (I regularly do!). It certainly beats our old holding tank system. It is easy to maintain and use. It is also a good conversation piece!

If you have any specific questions or comments about our experience with the unit (or anything else), please comment below. 

Friday, May 11, 2012

Composting Toilet Installation

Installation of the composting toilet itself is pretty straight forward. Much more effort was required removing the old toilet and adjusting the floor than was required for the actual installation of the toilet.

    Remove the existing toilet system parts, including:

    • Holding tank
    • Holding tank pump piping
    • Y-valve
    • Toilet and piping. Removing the toilet itself proved most difficult since the bolts holding it in place were stripped. A hacksaw was the final solution.

    Test fit
    Test fit the Airhead toilet. The back few inches of my head has a significant sloped area. This greatly reduces the working area of the toilet. After test fitting I decided to add a raised floor so that I could get the maximum front-to-back clearance.


     Make raised floor.
    I made the raised floor out of 1/2" plywood, cut to shape using a cardboard template and supported by 1x3 spruce boards. I stained and varnished the floor to match the rest of my bright-work. I used brass L-brackets to hold the raised floor in place. This will allow for easy removal if I need to get access below.

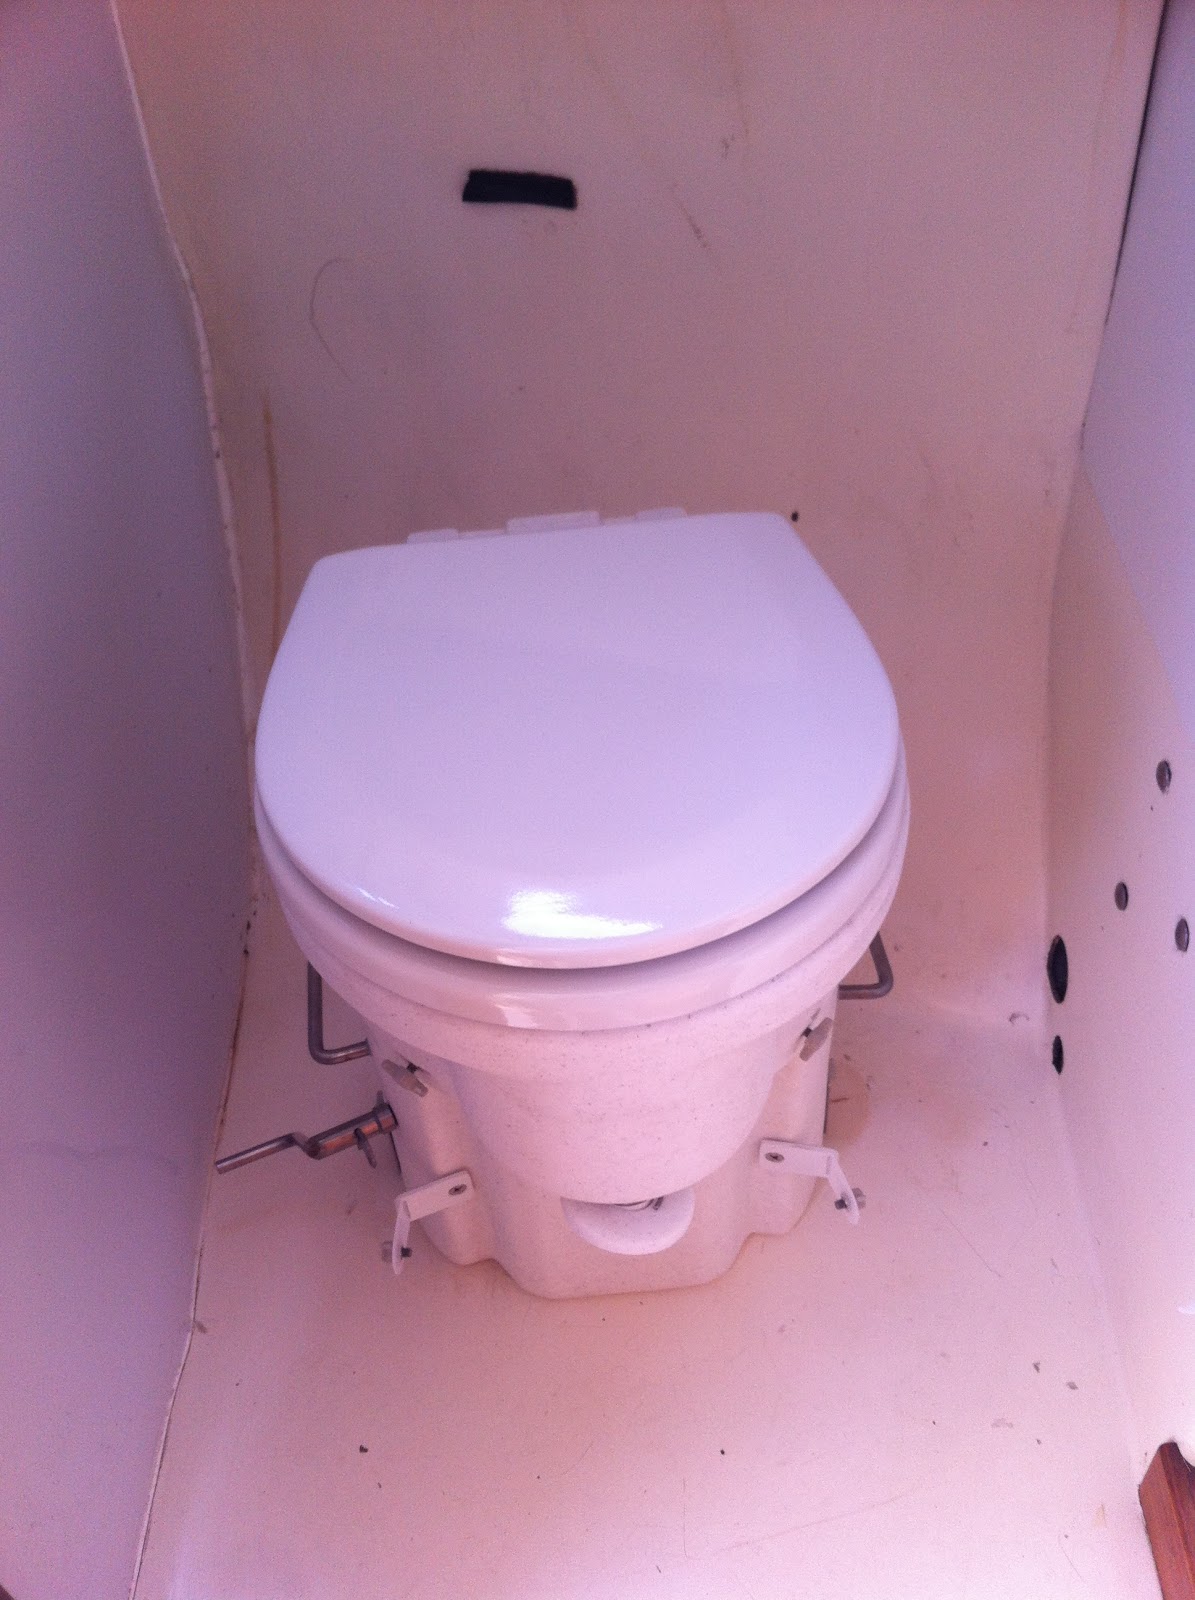
    Install Airhead unit. The toilet unit itself is literally as easy as screwing in 4 screws into the two brackets.
    Installed with raised floor

    Install air fan. I have an existing cowl vent into the bathroom. I simply screwed the fan assembly on top of the existing vent whole.
    Fan assembly attached to cowl vent

    Run vent hose. I used 6 feet of vent hose and simply attached it to the wall with 1 1/2" plastic pipe brackets. Once the pipe is tucked in properly it isn't as ugly as I expected.

    Run wiring.  I used standard 14 gauge wire (overkill I think) to wire directly from the fan to my auxiliary battery. I have two medium sized solar panels that keep up the charge on the battery. I don't even notice the load of the vent fan on my electrical. 

    Test run! I will update later with my production review of the toilet.

    Wednesday, May 2, 2012

    PVC Pipe Winter Boat Cover Frame


    After several years of mediocre success covering my boat with a traditional wooden boat cover frame, last fall I decided to change it out for a frame made from PVC pipe. Now that it is spring and the frame and cover have survived the winter flawlessly I figure I should share my design.

    I decided to use 1 1/2" PVC pipe since it is only a little more expensive but much sturdier than 1 1/4" pipe. I also made the arbitrary decision to space my supports at 3'.


    1. Determine the number of supports by dividing your boat length by 3. 
    2. Take a width measurement at each support location.
    3. Use a Triangle Solver or some basic trig to determine the lengths of pipe required for each side given width and the angles (90 and 45 degrees).
    4. Cut the pipe to length
    5. You will also need to cut 3' lengths of pipe to go between each support and a length of pipe for each end.
    6. Make the top 90 degree connector
      1. I used a single 90d PVC female-female connector attached to a female-female straight connector with a machine screw.
      2. Drill a hole in the center of the 90 and straight connectors.
      3. Attach them together using a screw and nut.
      4. I also drilled holes close to the edge of each side of the straight connector to fasten the connector to the lateral support pieces.
    7. Glue the entire support structure and connectors together using PVC pipe glue.
    8. Assemble the whole thing together with pipe glue using the vertical supports and the 3' PVC pipe sections. Do NOT GLUE!
    9. Use additional screws to hold the 3' pipe sections into the connectors.
    10. Cover the connectors with foam to prevent tarp chaffing. 
    11. Use tie-wraps to secure the frame to lifelines or whatever else you have that is sturdy.

    This whole project took approximately 2 hours once I had the design figured out. Assembly took approximately 30 minutes. That is a far cry from the hours that my previous wooden structure took to assemble.

    The slope of the frame seemed sufficient to keep snow from piling up on top. I didn't have to shovel it at all through the winter.

    Wednesday, April 4, 2012

    Prop Nut Zinc Anode

    My Hughes 29 has spent the vast majority of it's 40 year life in fresh water. Apparently electrolysis is still possible in fresh water but it certainly isn't fast acting. My boat hasn't had an anode installed (in recent history anyways) and shows no sign of corrosion. However, I do plan to hit salt water so I have been on the hunt for an appropriate anode.

    The problem with the Hughes 29 boats (confirmed by other owners that it's not just mine) is that there is very little clearance between the prop and the shaft housing. On my boat there is only 3/4" clearance.  That isn't enough room for a standard shaft mount anode. 

    After much searching, I found a source for an anode that would work. It is a  prop-nut mounted anode.  The following are the part number and spec for the anode. 


    CMPNCC10 - For 1" diameter propeller shaft. Complete set, zinc and bronze nut.

    Shaft Size: 1" (25mm)
    Length: 3" (76mm)
    O.D: 1 7/8" (48mm)
    Weight:  1.38 (0.63kg)
    Thread Size: ¾"NC10
    O.D.: 1 7/8" (48mm)
    Fastner: 5/16-18x1 socket head w/patch

    These anodes are available online at The Binnacle.

    Monday, March 5, 2012

    Why choose a composting toilet for your boat?

    The Preamble
    I've recently decided to replace the toilet and holding tank system in my Hughes 29.  This is the first of a series of posts that I am doing to outline my purchase decision, initial review (pre-installation), installation, short term review and finally a long term review. I will update this initial page with links to the other posts as I get to each step. I've also created an initial review of the [good] purchasing experience on my customer service blog here.

    Some background
    My Hughes 29 has a standard, manual pump, Jabsco marine head. This attaches to a Y-valve that has the option of either pumping directly overboard or pumping into a ~10 gallon soft holding tank (bag). I don't like the idea of pumping overboard and I try to avoid it as much as possible. So that leaves only the storage tank.

    I have had my sailboat for 3 years now. Since the first weekend on the boat I have had issues with the head smelling. I have tried tightening fittings, adding additives to the holding tank and frequent pump-outs but I still have a lingering smell problem. Sometimes it is tolerable, other times not.

    Last summer things came to a head (sorry!) because the only two pump-out stations nearby were both out of service for most of the summer. While I still had the option of dumping overboard, once the bag got full, that didn't alleviate my problem of having a large bag of sewage sitting under my bunk for most of the season. (I have no overboard pump connected to my tank.)

    A solution was needed. 

    My first reaction was to simply start from scratch and put in a new toilet and holding tank. I removed all of the pieces of the system last fall with that intention. I didn't want to start with any of the old components because I didn't want to risk a remaining piece being part of the problem. Then a few months ago I stumbled on the [seemingly] magic of the composting toilet.

    First things first, why a composting toilet? Here are the purported benefits (according to my research and vendor sites):

    • Odorless 
    According to all of the posts that I can find and the vendor documentation, these things are supposed to be odorless when they are installed and used properly. This was my #1 requirement. Apparently it is the separation of solids and liquids, along with the venting system that allow this.
    • Infrequent emptying of solids
    The leading vendors claim, and posts online seem to re-enforce the fact that you only need to empty the solids bin once or twice in a summer season (every 3 months for a live-aboard). Liquids are separated and need to be emptied every couple of days. I can live with carrying a bottle of pee onshore every couple of days. 
    • Space savings
    I really like the idea of reclaiming all of the space that my current holding tank takes under the front v-berth. The toilet itself is only 1 1/2" larger in each direction than my current Jabsco toilet. 
    • Easy installation
    Compared to changing out all of my current piping, installing a new tank, venting, and a manual overboard pump-out solution (a requirement in my view); installing the composting toilet will be a breeze! Simply bolt it down.
    • Environmentally friendly
    While I am very conscious of the environment, this isn't a huge factor in the decision for me. I don't believe that my boat (and small amount of discharge) is any more than a drop in the bucket compared to the local municipalities that dump [mostly untreated] waste into the same river system and harbour. But, it is a nice-to-have. 
    • Cost
    The vendors claim that their composting toilets are cheaper to install than a traditional system. I don't really believe that. The full cost of the composting toilet is around $1000-$1200 (after taxes and shipping). I can install a new version of what I have for around half that cost. 
    • Less maintenance
    Anything that can save maintenance time on the boat is worth its weight in gold. I don't mind doing maintenance but that isn't why I have the thing. Less is better.

    The two main vendors that I examined (that were in my price range) were:

    These vendors appear to have similar products and each has good reviews in the Internet forums. I chose Airhead because of the resoundingly good customer service stories that I heard. That is important to me

    Stay tuned for my future posts about my Airhead. Time will tell whether this decision was as good as it seems.

    Saturday, January 8, 2011

    John Gardner - A Plywood Pram

    After losing my Roar2 (still not sure what happened to it) this past fall, I have decided to build a replacement tender. I looked briefly at buying Zodiac style boat but thought that would be a bit of a cop-out.

     So, I started looking for a good tender design. I enjoyed Jim Mchalak's Roar2. It was a fun build and it rowed great but it wasn't the best fit as a tender since it was long and a little tipsy. After much searching I've come full circle back to a book that I already own by John Gardner called "Building Classic Small Craft". I really like the look, and ease of building of "A Plywood Pram" (Page 30).

    I really like browsing through John Gardner's designs in his book but they really aren't that easy to understand the steps in actually building the boats. (what can you expect when you get 46 plans in a $20 book.) I have a feeling that there will be a fair amount of figuring-out that will be required throughout this build. Rather than everyone having to go through the same figuring-out during their build, I'm going to document the build in a fair amount of detail in the hopes that it will make somebody else's life easier if they take on the same project.

    So, grab a copy of the book, and follow along in my build. Hopefully it will get you through your own as well.

    Follow all of the associated posts (as I get them written) by browsing the label "pram".

    Step 1: Build the jig