Sunday, December 22, 2013

Atomic 4 rebuild - Helpful resources

As I go through the rebuild process of my engine I will use this post to keep track, and propagate, useful information sources and links.

General Links

Moyer Marine - The definitive source of parts and information about the A4.

The Atomic Four Marine Engine  and  Replacements - http://pearsonvanguard.homestead.com/files/atomic4.htm

Atomic 4 Manual [Download]
Alberg 30 site- The Care and Feeding of the Universal Atomic Four Engine

Atomic 4 rebuild - removing manifold and accessory brackets

The manifold is held on with three threaded pins with 9/16" nuts, these nuts are missing from mine.
Atomic 4 manifold removed
Manifold removed
 There is a gasket behind the manifold. The gasket appears to be in reasonable shape but I will probably replace it.
Manifold gasket
Manifold gasket
 The manifold is in fairly rough shape. It has been previously repaired, there is some rough braising along the top-front. I will explore the part more thoroughly before deciding on replacement or re-use.
Manifold
Atomic 4 Manifold
I removed 3 other brackets at the same time:
  • Side alternator bracket (the alternator was not installed when I got the engine) - One 1/2" bolt holds this on.
Atomic 4 Alternator bracket
Alternator bracket
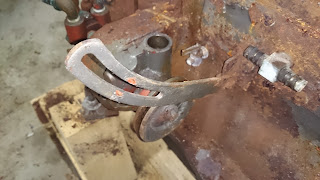
  • Some sort of bracket at the back that I'm not sure what it was use for. This was bolted to the back with two 1/2" bolts (2" long). I may or may not replace this depending on what it turns out to be for. 
Miscellaneous bracket at back. What is it?

  • Top alternator bracket - This bracket is held on by two 11/16" nuts on threaded studs. One of the bolts broke off while removing. I will have to remove and re-tap this bolt hole.
Top alternator bracket
Top alternator bracket with broken-off stud

  •  I also removed the breather hose - The breather hose is tapered from 3/4" to 1/2" (inside diameter) and is 4" long.

Atomic 4 Breather tube
Breather hose

[All of the posts associated with this rebuild are available under the search label Atomic 4 Rebuild.]

Monday, December 16, 2013

Atomic 4 rebuild - Removing coil and distributor

I am continuing to remove the miscellaneous pieces from the outside of the engine. I have started making detailed labels and notes and pictures for each piece that I am removing since I am not comfortable yet in my ability to remember where things should go and what fasteners are needed. I have been grouping like-parts into large ziplock baggies and organizing these in order. So far this has minimized the chaos of miscellaneous bits and pieces in my [cluttered] garage. 

  • Labelled, and removed ignition wiring. I left the spark plugs in for now since they provide some protection from grime and they aren't in the way. 
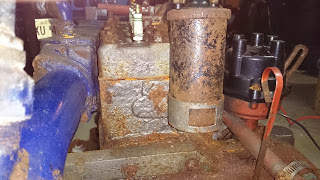
  • Removed the coil from the back side of the engine. Two 1/2" bolts hold the coil bracket in place. One was missing. I will need to re-tap the corroded thread of the missing bolt before re-assembly. 
Atomic 4 Ignition coil
Ignition coil
  • Removed the distributor cap. Both screws will need to be replaced.
Atomic 4 distributor
Distributor without cap
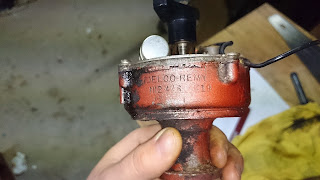
  • Removed the distributor. There is a bracket midway up on the distributor that holds it in place. Once the bracket is removed (single 1/2" bolt) it slides easily out. The distributor on my engine is the Delco variety, as opposed to the pre-1969 Prestolite ones. 


    Delco Distributor
    Delco Distributor 

    Delco Distributor
    Delco Distributor with bracket

[All of the posts associated with this rebuild will be available under the search label Atomic 4 Rebuild.]


Sunday, December 8, 2013

Atomic 4 rebuild - Removing and testing the starter

Starter on engine
The starter is held on with two 9/16" bolts. Remove these to remove the starter.

There is a great video on bench testing a starter here:

Following the directions in the video, these are the steps that I took to test:

  • Attach a switch between the ignition terminal and the positive terminal on the solenoid.  The ignition terminal is the one with an "S" beside it. 


  • Attach jumper cables from the battery to the positive terminal on the solenoid and the negative to a bolt on the body of the starter. 
  • Test
My starter tested fine. Here is the video of my test:


[All of the posts will be available under the label Atomic 4 Rebuild.]

Atomic 4 rebuild - Removing the flywheel

Atomic 4 front view
 Removing the flywheel is straight forward.

  1. Remove the front cover of the engine by removing the six 7/16" bolts around the cover.
  2. Remove the flywheel by removing the six 9/16' bolts. You might need to secure the flywheel from turning by bracing it with a large screwdriver. (mine came off easily) 
Keep track of all pieces and bolts by placing them in individually labelled bags or trays!


[All of the posts associated with this rebuild will be available under the search label Atomic 4 Rebuild.]


Flywheel cover removed
Flywheel removed


Friday, December 6, 2013

Atomic 4 engine identification - Serial number and build date

In order to find parts and details on the specific setup of the Atomic 4 it is important to know the date that the engine was manufactured as well as the serial number. Parts guides and tutorials will usually reference one of these numbers.
Example from Manual

Both are located below the breather hose, on the right side of the engine. The build date is the top number and is in the format MMDDYY. The serial number is the 6 digit number directly below.

Atomic 4 serial number and build date

[All of the posts associated with this rebuild are available under the search label Atomic 4 Rebuild.]


Atomic 4 Rebuild - Introduction

Atomic 4 - right side with serial number

Recently I came into possession of an Atomic 4 engine. A local sailor upgraded to a new boat and had a spare engine from his old boat that he had intended on rebuilding. I am taking over the rebuild project.

Goals

I have a few goals for this project:
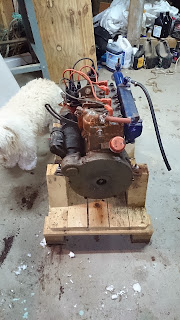
    Atomic 4 - frontAtomic 4 - left side
  1. Increase knowledge: Increase my knowledge of Atomic 4 engines so that I am more capable of troubleshooting and repairing my boat when needed. I am not mechanically inclined but need to be more self sufficient given my desire to cruise further in this boat.
  2. Spare: Given that my current A4 is 42 years old, a spare is important to avoid lengthy losses in precious summer boat time.
  3. Upgrade: Assuming that I am successful in this build, my plan is to eventually swap this new engine with my old one to provide more reliability and performance.  Not that my engine has been particularly problematic, it has been reliable for the most part.

Mechanical ineptitude 


Ineptitude may be a little strongly stated, however, I have very little mechanical experience. Over the last few years I have tried to increase my knowledge of engines and marine systems and I have successfully done some maintenance and repair jobs on my A4 (thermostat and exhaust manifold were the big ones).

All of this is to say that this engine rebuild will be completely new ground for me. While this is a great experience for me, it does mean that you should take my techniques, suggestions and recommendations with a BIG grain of salt. Talk to a mechanic if you want real advice!
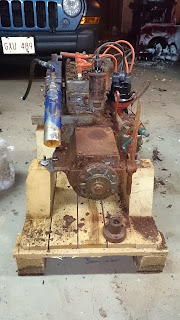
Atomic 4 - back


My primary resources, initially, for this project will be:
THE COMPLETE OWNERS & SERVICE MANUAL FOR THE 
UNIVERSAL ATOMIC 4 GAS ENGINE

Engine Builder's Handbook

I will chronicle this rebuild as detailed as possible so that others might find something useful out of it. All of the posts will be available under the label Atomic 4 Rebuild.